In a heartwarming and unexpected turn of events, a recently adopted stray dog, Benson, saved the life of a newborn baby in the middle of the night. The Robinson family, who had just moved into a new home in a remote area, never expected that their decision to adopt a dog would lead to such a life-saving act of loyalty.
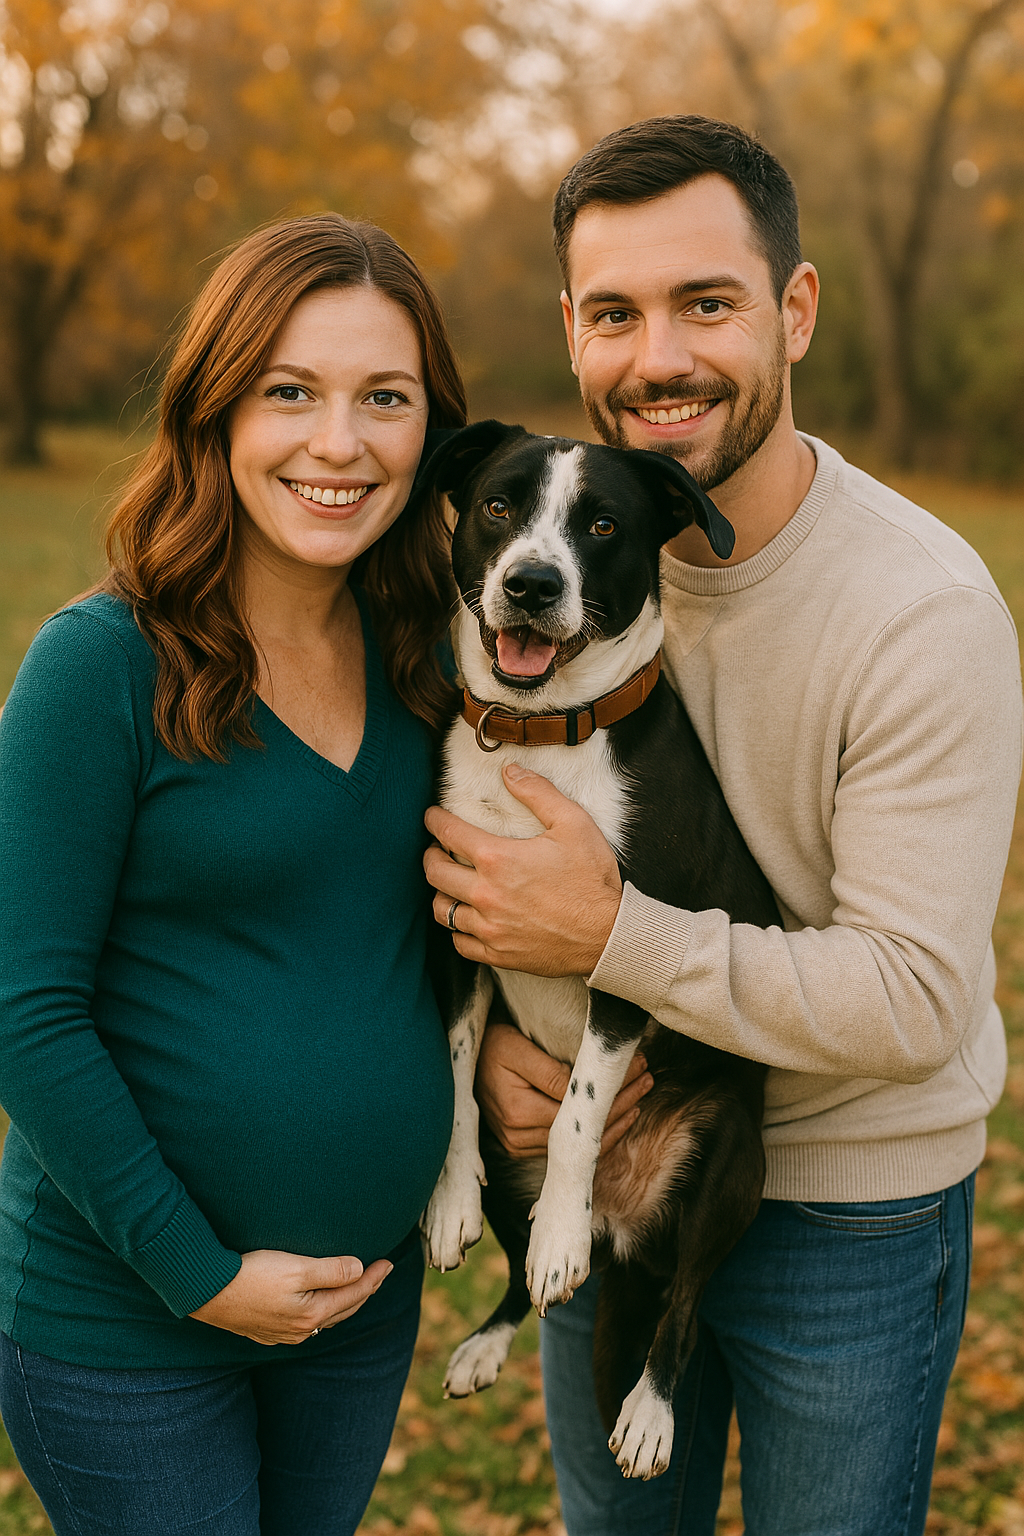
The Robinsons, who had been living in a small apartment, decided to adopt a dog after settling into their new house. They had always wanted a pet, but were unable to keep one before. After visiting several shelters and hearing the stories of abandoned animals, they found Benson, a shy Pit Bull with a painful past. He had been used for fighting and was later abandoned on the streets. His experiences left him fearful and distrustful of humans, but the Robinsons saw potential in him and decided to adopt him.
Benson’s transformation was not immediate. At first, he kept to himself, but over time, he began to bond with the family’s son, Mathias. When the Robinsons welcomed their second child, Benson showed nothing but love and affection towards the newborn. However, one night, something unusual happened.
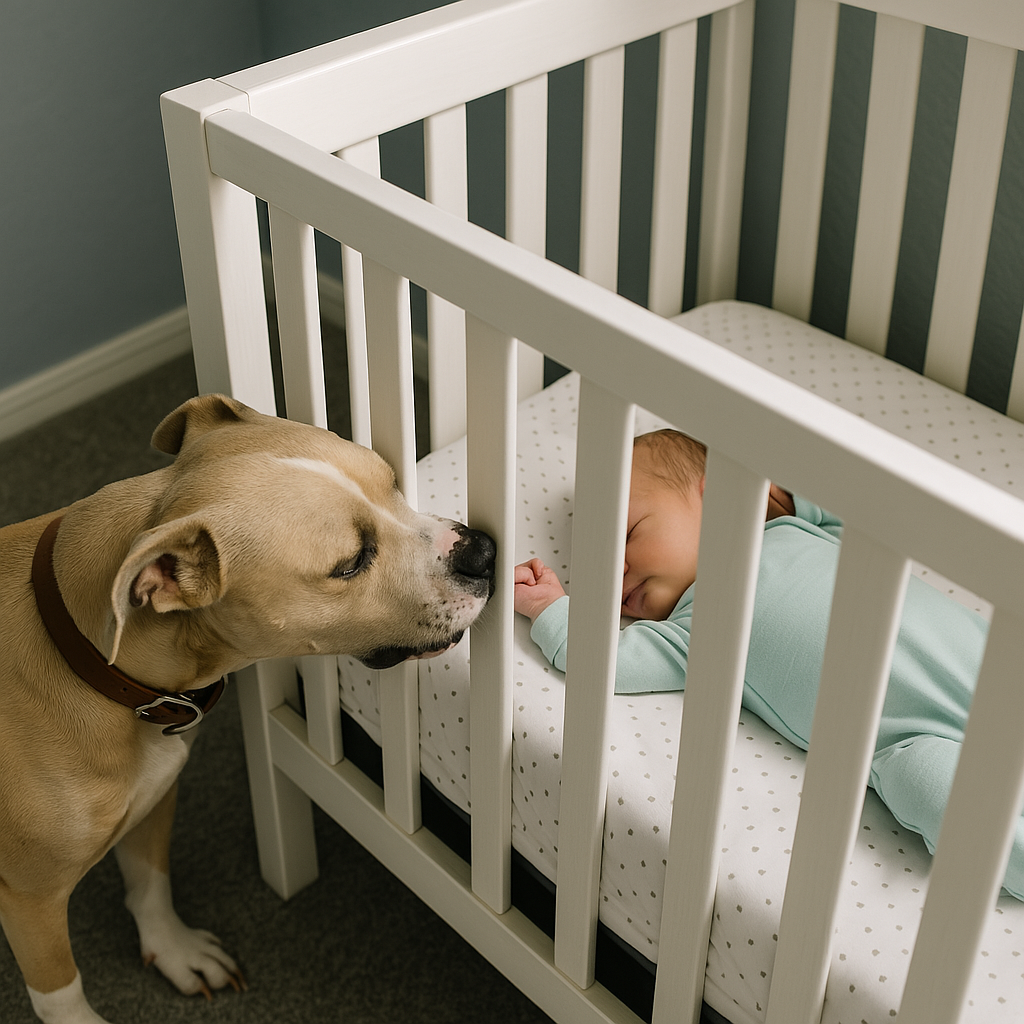
The family was startled by loud barking coming from the baby’s room. Rushing to the scene, they feared the worst, thinking that Benson might be harming the baby. To their shock, they discovered that the baby had stopped breathing, and Benson was desperately trying to alert them by biting the crib. The dog was not trying to harm the baby but was trying to save her.
Quick-thinking, Mrs. Robinson rushed the baby to the hospital, where the doctors confirmed that if Benson had not alerted them in time, their baby would have died. The Robinsons were forever grateful to the dog that they had rescued and given a second chance at life. They never imagined that Benson would, in turn, save their child.
This miraculous event highlights the incredible bond between humans and animals, and the deep instincts that animals have to protect those they love. Benson, once a neglected and abused animal, became a true hero for the Robinson family, demonstrating the power of rescue and the unexpected ways in which animals can save lives.
The Robinson family’s story is a reminder of how adopting a pet can not only bring joy to a family but can also lead to life-changing moments. If you’re considering adopting a dog or any other animal, remember that rescue pets are capable of extraordinary acts of love and loyalty.
Read More: Full Story: 10 Signs You’re Eating Too Much Sugar